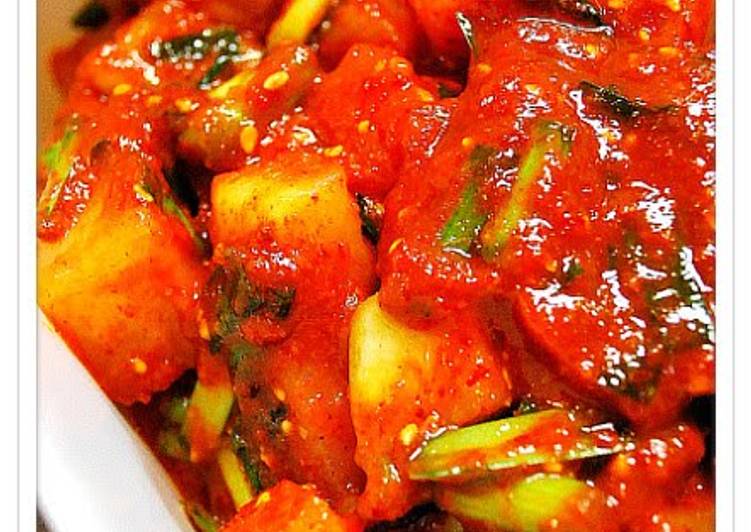
Kkakdugi (Cubed Radish Kimchi). Kkakdugi (깍두기) is a kimchi made with Korean radish, mu (or moo, 무). It's an easy kimchi to make! Simply cut the radishes into cubes, salt for a short time, and then mix with the seasonings.
 It is also much simpler to make than the classic cabbage kimchi. Kkakdugi Korean Cubed Radish Kimchi Kkakdugi is a type of kimchi made from diced radish. It's a very common kind of kimchi and often used in Korean everyday meals along with baechu kimchi (napa cabbage kimchi). You can cook Kkakdugi (Cubed Radish Kimchi) using 21 ingredients and 19 steps. Here is how you achieve that.
Ingredients of Kkakdugi (Cubed Radish Kimchi)
- It's of Daikon radish.
- You need of Salt.
- You need of ★ Small dried sardines (niboshi).
- It's of pieces ★ Kombu.
- It's of ★ Water.
- It's of ▼ Rice.
- You need of ▼ Dashi soup stock.
- Prepare of ◆ Onions.
- Prepare of ◆ Garlic.
- Prepare of ◆ Ginger.
- Prepare of ◆ Korean red chili peppers (red).
- It's of ◆ Japanese plum extract.
- Prepare of ◆ Sardine extract.
- Prepare of ◆ Fermented krill.
- Prepare of ◎ Korean red chili powder (for kimchi).
- Prepare of ◎ Red chili powder (seasoning).
- You need of ☆ Green onions.
- You need of ☆ Chinese chives.
- You need of Sugar.
- Prepare of Salt.
- You need of Toasted sesame seeds.
Radish kimchi is a kimchi made out of radish and its Korean name is Kkakdugi (깍두기). The name originates from kkakduk sseolgi (깍둑설기) in Korean. It describes the motion of cutting food in cubes. Many Koreans say Kkakdugi made in mid to late autumn (October to December) tastes best as it is the Korean traditional radish harvest season.
Kkakdugi (Cubed Radish Kimchi) instructions
- Thoroughly rinse the daikon radish, and peel the skin with a peeler. Set aside the stalk end and root end. Do not discard..
- Chop the daikon radish into 2 cm rounds, dice them into 2 cm square cubes, then place them in a large bowl. Set aside the triangular shaped pieces..
- While chopping the daikon into cubes, place the ★ ingredients, the triangular shaped daikon pieces and the root end into a large pot with water to prepare the broth..
- Thoroughly rinse the stalk end, and cut the undamaged leaves into 2 cm lengths..
- Combine the cubed daikon and the leaves, add salt, lightly toss, and let sit for 1 hour. Do not rub the salt in..
- After 30 minutes, gently toss to evenly distribute the salt. Do not rub the salt in..
- Turn on the heat under the pot from Step 3, reduce it to medium-low heat after bringing it to a boil, then simmer for 30 minutes to make the broth. Do not let it boil..
- After about 1 hour, thoroughly drain the daikon and leaves from Step 6..
- After the broth is finished, prepare the yangnyeom. Put the rice in a bowl, pour in the hot broth, then process with a hand mixer..
- Process the rice and broth from Step 9 into a thick paste-like porridge, and transfer it to a large bowl..
- Prepare the ◆ ingredients to add to the porridge from Step 10. Remove the seeds from the red chili peppers, then roughly chop them with the onion, garlic, and ginger to make them easy to process, then add them to the porridge..
- Pulse the porridge with the added ingredients, check to make sure that the red chili peppers are finely processed, then turn off the mixer..
- You should be able to buy the Japanese plum extract at a Korean specialty shop. You could also substitute it with sweet syrup or a mild honey, but you will need to adjust the amount of sugar that you add..
- Add the plum extract to the porridge from Step 12, mix well, let it sit for 10 minutes, then stir again. Then the yangnyeom is ready..
- Place the daikon and leaves from Step 8 into a bowl, chop the ☆ ingredients into 2 cm lengths, add them with 250 g of the yangnyeom from Step 14, and evenly combine..
- Gradually mix in the sugar and the salt, and season to taste..
- Add the toasted sesame seeds and mix..
- It's done! Enjoy the three distinct flavors of freshly pickled kkakdugi, marinated kkakdugi, and sweetly acidic kkakdugi.
- Store it in a Tupperware container with a lid, let it sit for a day at room temperature, then store it in the refrigerator from the next day onwards..
One of my favorites is an easy one, called Kkakdugi (깍두기). It's a large Korean radish that's been cubed up and seasoned very similarly to a standard napa cabbage kimchi. My mom made kkakdugi for us when we were kids, but only a couple of times per year. The cabbage version was the staple in our household, as it is in most Korean homes. Clean the radish with a kitchen brush and rise well.
Comments
Post a Comment